Using Webex to record and share a lecture or meeting
Click Start a meeting
Once the meeting has started, press the record button in the center of the screen (if presented with the option, please select record to the cloud)
Conduct your lecture
- If you would like share a presentation or your screen, please refer to the Using tools to share presentations and record your meetings here
Press the recording button again and stop the recording
End your meeting
Access your recordings and share with others
Select the recordings tab from the left hand menu
Locate your most recent recording and use the edit button  to change its name. (Please keep in mind that it can take up to two hours for recording to be processed and available)
Use the share button  to access the sharing options
 -
From the sharing menu you can share the recording directly with other via email or copy the public link and post it to you blackboard course.
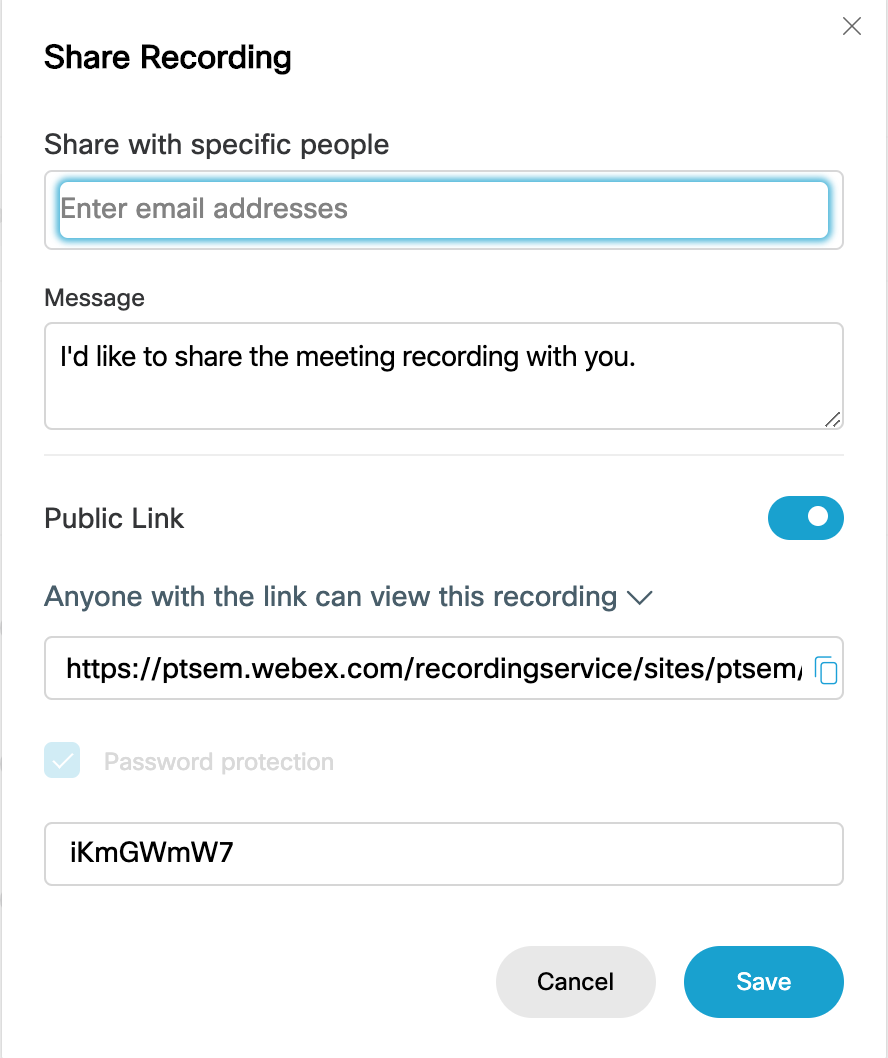
- if you plan on posting the public link to you Blackboard course be sure to copy the passcode under the public link.
- Once you have made all the necessary changes, Click Save.
- If you have shared the recording with anyone via their email address, they will recieve a notification on how to access the recording.
To upload the public link to your blackboard course, please follow this article.
For more information regarding the usage of Webex for you classes or meetings, please visit this article.